 My Cookbook: Souk to Table
 Foolproof Homemade Baklava
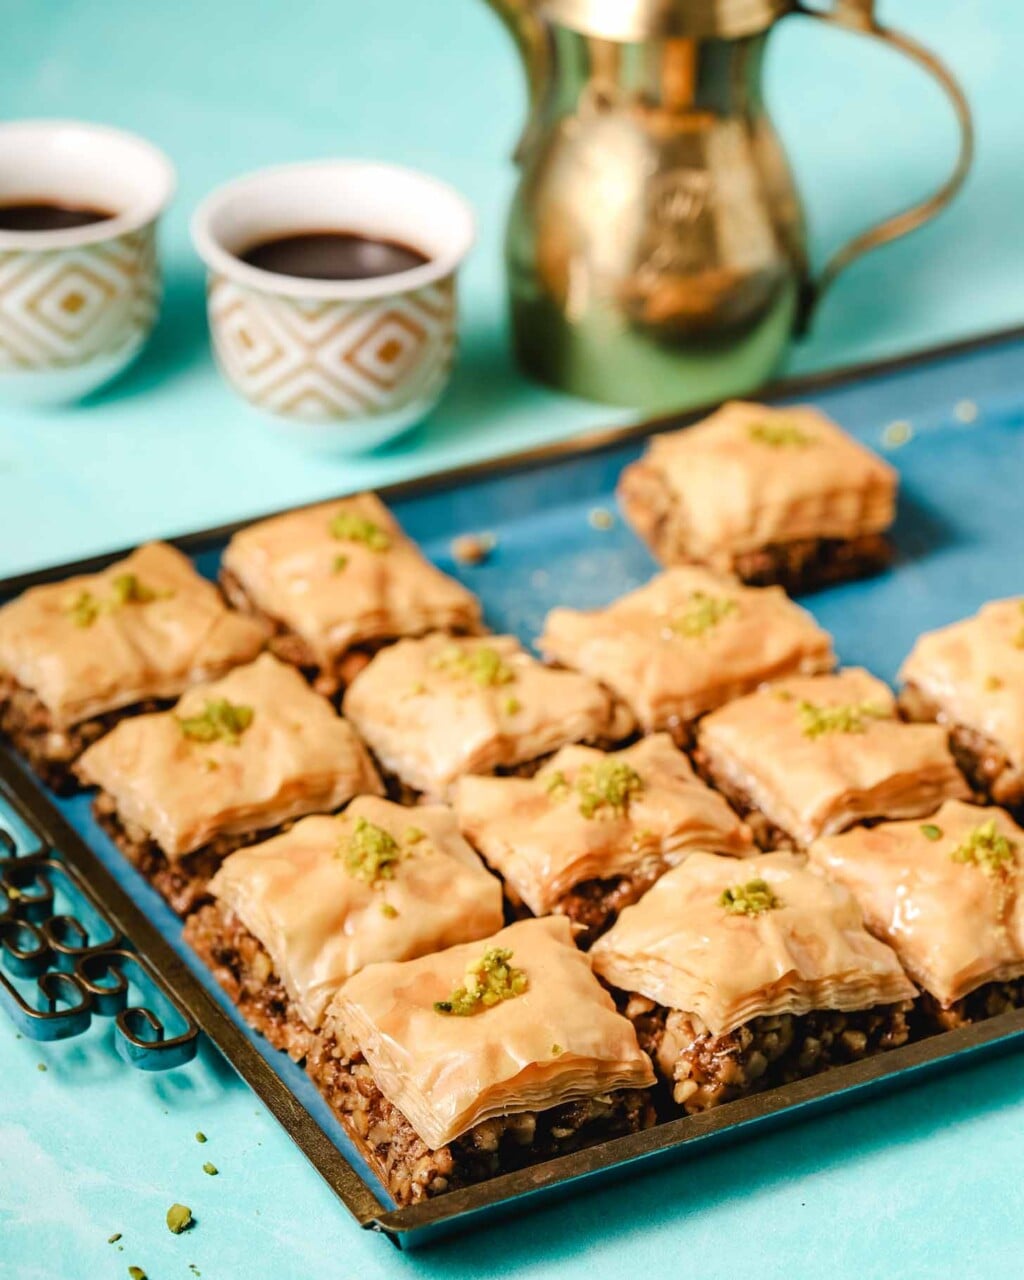
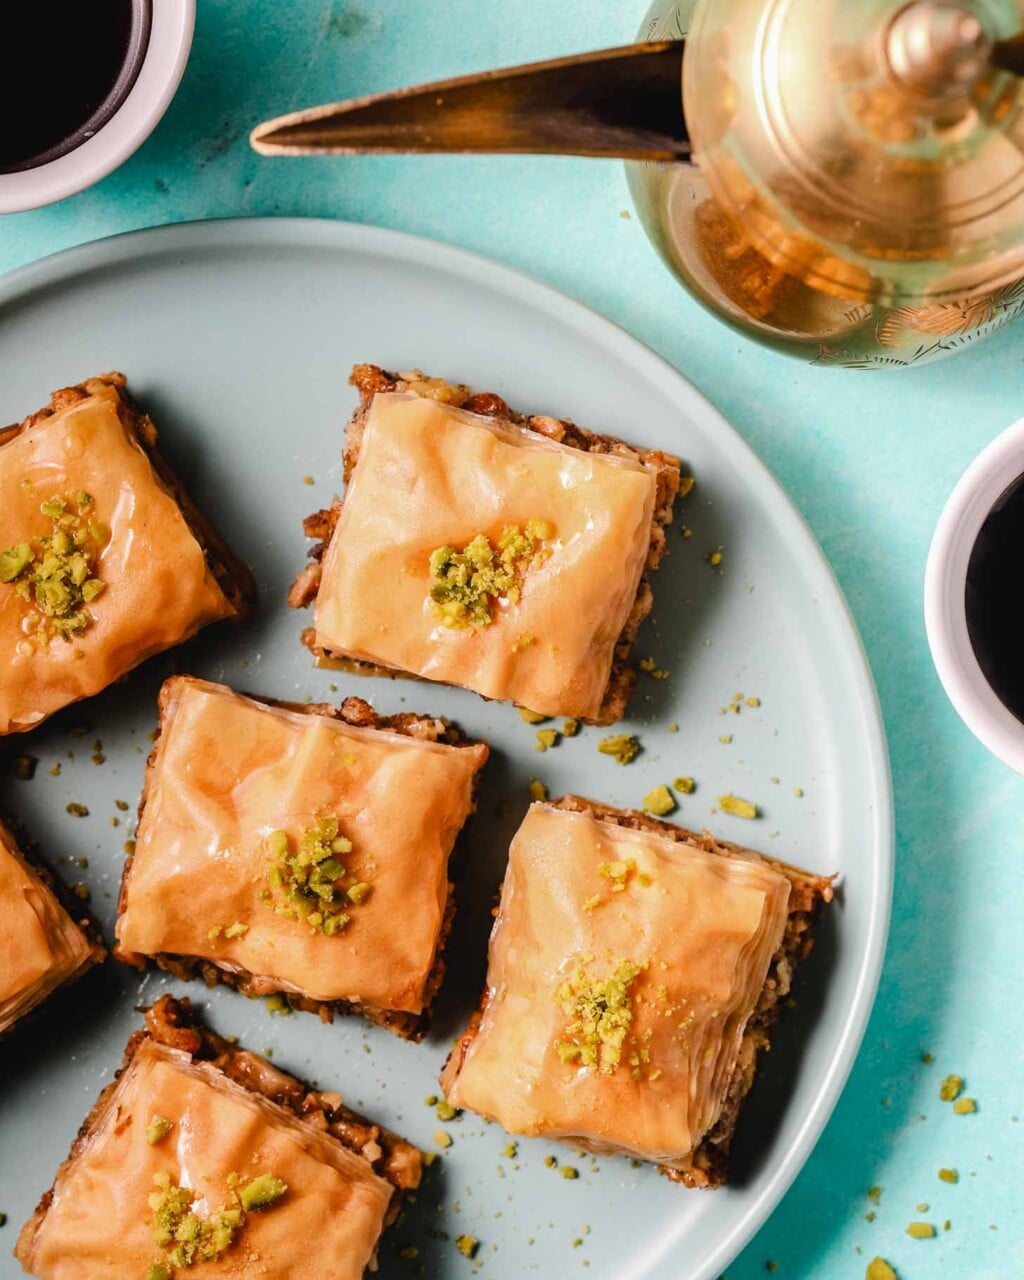
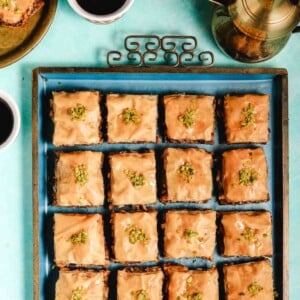
Baklava is a beloved Middle Eastern and Turkish dessert often served during holidays, weddings and family celebrations. Made with delicate layers of crispy, buttery phyllo dough, this classic baklava recipe is filled with chopped walnuts, gently scented with cardamom, and drenched in simple syrup. While homemade baklava may seem intimidating, it’s surprisingly easy to make with the right technique and a few tried-and-true tips I’ve learned over the years. Make homemade baklava to impress your guests and never resort to the overly sweet store bought version ever again!

Want to Save This Recipe?
Enter your email & I’ll send it to your inbox. Plus, get great new recipes from me every week!
By submitting this form, you consent to receive emails from Hungry Paprikas.
5-Star Review
“I tried this recipe and it came out simply perfect. What a nice balance of all the ingredients and those tips make the job quite handy. I would have never believed that making baklawa was this easy before going for this one. Honestly Best baklawa ever!!”
—Saira Khan
I Never Buy Baklava!
I refuse to ever buy baklava again. Every time I taste store-bought baklava, I think to myself: how can people love this? It is so far from what good baklava should actually taste like, most of the time. And this opinion is based on high quality bakery baklava from the countless middle eastern bakeries in Toronto.
Over the years, I perfected my family’s recipe (which we call baklawa in Arabic) to the point where my friends were asking me to sell it. I make it a lot because it’s commonly served at celebrations (like ramadan and Eid), alongside other popular middle eastern desserts like Kunafa, Znoud El Sit, Umm Ali, or Mahalabia.
My secret? A baklava that is very crispy and crunchy due to my layering technique, filled with nuts because you just can’t skimp on them, and the perfect level of sweetness! It stays crispy on your counter for a week, I promise!
I love baklava so much that I’ve even experimented with apple pie baklava and hit a home run – so if it’s apple season, make that one.

How to make Baklava at home, Step-By-Step
It’s actually made with only a handful of ingredients:
- Phyllo pastry: I usually use two packages (450g-500g boxes) to get two thick layers of phyllo at the bottom and top.
- Butter and olive oil: some baklava recipes call for only butter, but after lots of testing, I found that the combination of butter and olive oil yields the best flakiness and flavour. The olive oil helps keep it crispy for longer.
- Nuts: walnuts is my go-to for this recipe because its more economical, but pistachio can be used, or a mixture of the two.
- Cardamom: cardamom is highly recommended to flavour the nuts, but if you love cinnamon, you can use that too. Grinding fresh green cardamom pods yields an amazing flavour and aroma that I highly recommend.

Preparing the Baklava Components
You start with making the simple syrup by placing the sugar and water in a pot and bringing to a boil then simmer for 10-12 minutes. It’s important to do this first so the syrup has time to fully cool down.
Next, melt the butter and mix it with the olive oil in a small bowl.

Next, make the nut mixture by chopping walnuts in a food processor until you get a coarse consistency. It’s fine if you get pieces in different sizes, as long as the individual walnut gets broken down into about a fifth of it’s size.
Then mix in the cardamom and add 3/4 cup of the simple syrup so the mixture looks wet and sticks together. This is a game-changing tip that really helps with the cutting step later on.
Tip: Adding the simple syrup to the nuts makes it much easier to cut, since the nuts will be wet and stick together.


How to Layer Baklava
To start layering, first measure the phyllo pastry according to the pan or sheet pan you are using. Cut the pastry to fit your pan size exactly using scissors. I recommend using a half sheet pan because typically, most phyllo pastries come to exactly those dimensions, so I don’t need to cut it.
Start by brushing the pan with the oil and butter mixture, then layer 3 phyllo sheets. Then brush oil/butter, then layer another 3 sheets. Do this until you use at least 10-11 sheets, brushing every 3rd layer. Don’t be shy with the butter/oil – brush generously!
Tip: Every time you add 3 layers, press down and across the pan so you can get rid of any air bubbles that form. This will help keep the layers flat and intact.

Add the walnut mixture spreading evenly and flatten it well with the your hand, creating one even layer of nuts across the pan.


Repeat with phyllo pastry layering the same way, brushing every third layer, and making sure you apply a generous amount of butter/oil to the top layer.

Using a sharp knife cut the baklava – read the next section for tips on cutting! This is a really important step, to ensure the baklava shape stays intact.

- Bake at 350F for about 45-50 minutes until the Baklawa is a light golden colour
- Pour the simple syrup on top as soon as it’s out of the oven – it will make a sizzling sound and that’s exactly what you’re looking for! Then allow it to cool completely before serving.
How to cut Baklawa to achieve a diamond shape
You must cut the Baklawa before it’s baked. It’s slightly tricky since you need all the layers and the nuts to stay intact. The key to getting a perfect cut is a really really sharp knife. Then start by making straight cuts horizontally across your pan, about 1 inch in size. Then make diagonal cuts starting from one corner of the pan, evenly spaced until you reach the opposite corner. If the diamond shapes are too hard for you, you can always make squares.
As you cut, make sure you don’t drag your knife, but rather make a rocking motion so the phyllo pastry is cut rather than dragged across. Also go over your cuts twice to ensure the last layer is actually cut. While cutting, hold the pastry down using your fingers, but also careful not to tare any of the layers. One final tip you can do to make it easier, is to freeze it for about 10 minutes then cut, which will help hold everything together. Check my video for how I cut this Baklawa!
How to store Baklava to keep it fresh
Baklava must be allowed to cool completely to room temperature before storing. Then you can store it in an airtight container on the counter if you’re going to eat it over the course of a few days. It’s fine to also layer the pieces – they should break apart easily. If you end up placing it in a container when it’s even just a bit warm, it will soften. So make sure you cool it really well!
It also freezes super well, so you can simply place the pieces in one layer in a container and place it in the freezer. It can stay in the freezer for a few months. Thaw at room temperature before eating it.
This recipe makes about 90 pieces – so it’s the perfect dessert to make for a celebration and share with friends and family! I hope you end up trying it, and if you do, make sure you comment and let me know what you think! Also I’d love it if you can take a photo and share it with me on Instagram.
If you tried these recipes, please consider leaving a star ⭐️⭐️⭐️⭐️⭐️ rating in the recipe card below and/or a review in the comments section further down the page – I’d love to hear from you! You can also hop on over to Instagram and say hello!
Foolproof Homemade Baklava
Ingredients
- 1000 grams 20-22 sheets of filo pastry, two 500g packages with 10-11 sheets each
- 1/2 cup butter, or substitute ghee
- 1/2 cup olive oil, or substitute vegetable oil
- 1 kg walnuts
- 3 tablespoons ground green cardamom
- 2.5 cups sugar
- 1 1/4 cups water
Instructions
- Preheat the oven to 350F
- Start by making the simple syrup by putting the sugar and the water in a pot and bringing to a boil. Once it boils, lower to a simmer for 7 minutes. Allow to cool
- To prepare the filling, grind the walnuts in a food processor until you achieve a coarse consistency (as pictured). Each walnut should break up to about a fifth of its size
- Mix the walnuts with the ground cardamom and also add 3/4 cups simple syrup (leave the rest for later). Mix until it looks well combined and wet
- Melt the butter and mix it with the olive oil
- Unwrap the first filo pastry box (it dries out so work fast). Measure the dimensions against your pan (I used a 13 inch by 18 inch pan) and snip any excess using scissors. The filo sheets should sit inside the pan up to the edges
- Start the layering process by brushing the bottom of the pan generously with the butter/oil. Then layer 3 sheets of filo on top, ensuring you press down and remove air bubbles as best as you can every time you add a sheet
- Brush the third layer of filo generously with the butter/oil, then continue layering, brushing every third layer. If you are using 10 or 11 sheets, also brush the top most layer with butter/oil (even if it is not the third sheet). If you have more sheets, feel free to use up to 15 layers
- Spoon the walnut mixture onto the filo pastry covering it all evenly and pack it down using the back of a spoon or your hand
- Unwrap the second box of filo pastry and measure it the same way. Then start layering the filo sheets and brush every third sheet generously with butter/oil, making sure you remove air bubbles. Continue until you reach the top, and also brush the top generously with butter/oil
- Using a sharp knife, make straight cuts parallel to the long edge of the pan, roughly 1 inch in size. Hold down the pastry gently as you cut, and use a rocking motion so the pastry does not drag out of place. You should be able to fit 8-10 rows if using the same size pan. You can also cut them bigger for an easier option
- Then make diagonal cuts running from one corner of the pan all the way to the opposite corner to create diamond shapes (refer to video). Go over all the cuts twice to ensure you cut all the layers
- Bake for 45-50 minutes until the Baklawa is a light golden colour
- Take it out of the oven and pour the remaining cooled simple syrup on top. You may hear a splashing sound and that’s okay!
- Optional: garnish with crushed pistachios and rose petals
- Allow the Baklawa to cool completely before serving. Also read the storing instructions above
Notes
- You can use more filo sheets, up to about 15 sheets on the bottom and top layers of the Baklawa. It will yield a higher Baklawa with more pastry dough, if preferred
- To make the cutting process easier, you can flash freeze the whole pan for about 10 minutes then start cutting
- Before storing it in an air tight container, ensure the Baklawa has cooled completely for at least 2 hours
- You can freeze the Baklawa to keep it fresh – read the storage instructions above
The baklava turned out amazing, thanks Amina! Your recipes are always spot on so I didn’t think twice about making baklava for the first time for a party.
Thanks for the foolproof recipe,first to try making baklava in my family and everyone thinks its store bought!!! One of the best recipes!!
Really excited to make this for an iftar this Ramadan!! Do you think I could use all Ghee or should i mix an oil with it as well? Thank you!!
Hi Yasmeen – yes you can definitely use all ghee, it’ll work out perfectly! Let me know how it goes!
Hi, can’t wait to make this! Two questions: one, above you say olive oil and butter and then below you say vegetable oil and butter. Which one is it? Also, could I use ghee instead, do you recommend that? Also, if I’m using a bigger pan, is the baking time longer or no?
Hi Ellie! Apologies for that – use olive oil if you have it for better flavour. but if you don’t then any other neutral vegetable oil will work too. Yes you can definitely use ghee! It’ll work so well. Baking time should be roughly the same even if using a larger pan. Let me know how it goes!
Such an amazing and easy recipe to follow. Baklava sounds kind of intimidating to make but once you do it’s so fun, easy and super delicious!! Perfectly sweet, crispy and nutty. This is my to go recipe.
Thank you Amina!!
That’s so wonderful to hear Uneza, thanks for the feedback!
Amazing recipe!!! Made it a couple times and always get compliments. Question – the top phyllo doesn’t stay on. Any tips?
Thanks for the great feedback Sana! As for the top layer – that’s completely normal for it to flake off a bit in places. Maybe try to ensure the top layer adheres as best as you can with more butter. 🙂
I can’t wait to make it for EId. I am going a little off and going to use the phyllo ready made cups and use your recipe for the filling. I was curious, can I add pistachios too with the walnuts? I have a bag of them and i don’t want them to go to waste :’)
You can definitely add pistachios! There is actually a pistachio version too and mixing them is wonderful. Good luck!
Turned out perfect! Your recipes never disappoint. Tastes and looks like its store bought. Thank you for another amazing recipe!
I’m so glad it worked out for you Hanadie! You’re very welcome 🙂
I tried this recipe and it came out simply perfect. What a nice balance of all the ingredients and those tips make the job quite handy. I would have never believed that making baklawa was this easy before going for this one.
Honestly Best baklawa ever!!
Thank you so much Saira – I’m so happy to hear that all the tips helped! Well done for making it!
I made this two times and it’s so so good
Every one love it💕
Thanks Amina .
Yay! So glad to hear that Samira!
Hands down the BEST Baklawa EVER!
This baklawa recipe is perfect!! It was my first time using phyllo pastry. It was super easy with all the step by step directions.
It turned out delicious. Yummm!! Can’t wait to make more.
Woohoo! Thank you Uneza! I’m so glad you attempted it and found success!
Followed the recipe and the baklava was a hit! The hardest part was to shimmy and cut the diagonals….only to realize you have to do it twice! Totally worth it. Make sure the knife is SHARP! Another tip was the walnut. I didn’t have a scale to measure the weight and used cups to measure the nuts nuts. This initially yielded less filling (since walnuts are funky shaped!). No big deal though, as I added another 1/4 cups and it was fine in the end. Beware….the final product is dangerously addictive!
Great troubleshooting Sal! So glad you enjoyed this recipe and did well with the cutting! I totally agree – it is completely addictive and I usually don’t rest until its all gone! XD